Vital Steps: Server Migration Checklist for Ecommerce Stores
Server migration refers to the process of changing your website’s hosting from one web server to the other. There are different reasons for migrating your website to a different server. For example, you may want better performance, reliable uptimes, improved security features, etc.
When going through the process, there are some important steps that you should perform to ensure that your store gets back up and running in no time. So we’re going to take a look at seven of the most important things that you should do during server migration.
Server Migration Checklist for Ecommerce Stores

Back up your data
You should back up your data before starting the migration process so that none of it is irretrievably lost. Important data, such as the details of your products, website content, and custom code for webpage functions should be saved beforehand. That way, if there is a problem in the migration process, you can revert to the old design. Or, if a specific portion of the data gets lost or corrupted, you can instantly fetch it from the backup files.
The method for backing up your e-commerce store data depends on the platform that you are using. For instance, if your store is on Shopify, you can simply download most of your store data to your device as a CSV. Then, you can use that data once you migrate servers and set up the store again.
Let’s talk a bit about Shopify specifically, as it is one of the most popular e-commerce CMS platforms.
Steps for Shopify
If you are using Shopify, there are some types of store data that you can export in a CSV file and save to your device. For example, you can save data related to your products, customers, inventory, and orders. However, you cannot export data such as blog posts or your store’s theme.
Here is how you can back up your store data:
- Log in to your Shopify admin.
- From the menu on the left side, click on “Products.”
- Once the list of products opens, click on the “Export” button on the top right corner.
Follow the same steps for the other types of data as well.
Steps for WordPress
WordPress is also a popular platform that people use for their e-commerce stores. Plugins like WooCommerce allow people to set up an online store using WordPress, even though the latter is usually associated with blogs and service websites.
Saving and backing up data on WordPress is much simpler and easier. There are many different plugins available that you can use to quickly create backup files and save them to your system.
Change the DNS settings for your domain
Once you have saved the backup data, you can get started with the actual server migration. The main step required to switch the hosting servers for a website is to change the DNS records.
If you are only changing the server, you would have to make changes to the A record so that the new IP address for the website is configured. On the other hand, if you are changing the server and the DNS provider, the changes would have to be more extensive. The NS records would have to be altered as well.
- In the NS records, you will have to enter the names of the new nameservers
- In the A record, you will have to enter the IP address of the new server
- In the MX record, you will have to enter the name of the new email server responsible for receiving email messages on behalf of your domain
How to access your DNS settings?
You can access your DNS settings from your domain registrar platform. You can sign in to the domain registrar, such as GoDaddy or Namecheap, and then navigate to the control panel. cPanel is the default control panel in many of these platforms.
Once you sign in to the control panel, you can usually find the DNS record settings in a clearly indicated menu. For instance, in cPanel, you can access and modify the DNS records by accessing the “Zone Editor” from the main home page.
Double-check all the DNS records
After making the changes to the DNS records, you should also double-check them using whatsmydns.me. With this DNS checker, you can easily view all of the DNS records of your domain, including the A record, NS record, MX record, etc.
You should run the DNS check to make sure that all the DNS settings are properly configured after the migration is done. You should check even the records that you did not modify to make sure they are not altered in any way.
The MX records, for example, are responsible for describing the email servers for a domain. Once you migrate servers, the MX records can also change. You should confirm that they contain information regarding the newer server and not the old one that you’re no longer using.
Perform extensive functionality testing
After you have shifted your store to the new server, you should test all the different functions on the different pages. This includes all the on-page elements, such as the different buttons, menus, animations, etc.
Performing this testing will help you find any problems in the site’s working that may have occurred as a result of the migration process.
Here is a more detailed breakdown of the various functions that you should test on your e-commerce store once it has undergone server migration.
- Sign up/Sign in function: Check and make sure that users and visitors can easily sign up for your e-commerce store. You can do this by creating dummy sign-up details.
- Checking out function: Make sure that the visitors on your site can easily check out once they have decided what they want to buy.
- Review function: Ensure that the reviewing system in your store is correctly set up so that your customers can leave their ratings for others to see.
- Wish list function: If there is a wish list function on your website that allows visitors to save certain products for later, make sure that it is working properly.
- Product filters and categories: Product filters and categories make your store’s user experience smooth and seamless. Make sure that this function is working properly so that your customers can view the products that they want.
- Search function: Check the search function to see that it provides accurate results based on the user’s query.
Check website loading speed and server performance
Apart from the functionality of your website, you should also check the server’s performance by monitoring factors such as the loading speed, download speed, etc.
If your store is not loading fast enough and the overall server-side performance is low, it can lead to a negative user experience.
Issues such as long loading times can also indicate problems that may have occurred during the migration.
How do you check the website loading speed of your online store?
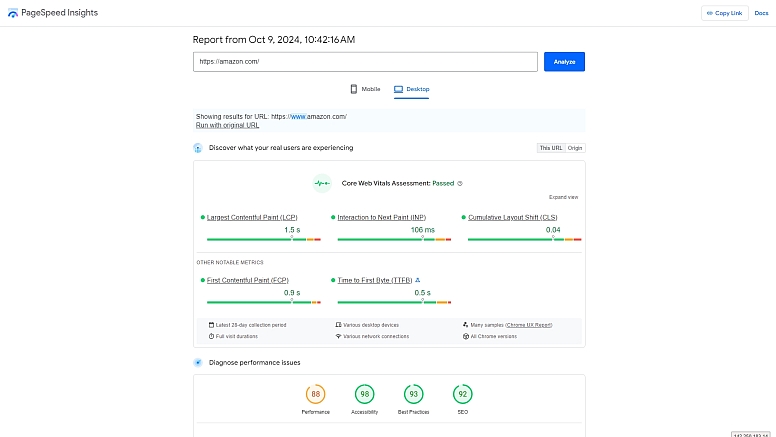
One of the easiest and most reliable methods of finding the loading speed of any website is to use PageSpeed Insights by Google. It can tell you how your website scores in terms of accessibility, speed, best practices, and SEO.

Double-check the products and their details
Once the server migration is done, it is important to make sure that all the products and their respective details are correctly displayed. It is possible for some of the products to get de-listed or their details removed, etc.
Double-checking all the products post-migration helps you make sure that your visitor’s experience is not disrupted and that your website can get back to normal quickly.
And instead of doing a cursory once-over of the products, check them individually to see that the pricing, features, description, and images are all in place.
Here are some more specific tips to follow regarding these checks:
- Make sure that all the product names and descriptions are in place and haven’t been deleted accidentally during the migration.
- Make sure that the pricing of all the products is correct.
- Check the images and see if they are being correctly displayed.
- Check the “Features” section of the products.
Make sure that the store is optimized for SEO
Your e-commerce store should be optimized for SEO so that it can organically draw visitors from search engines. Different elements of a website play a role in SEO, such as its user interface, content quality, loading speed, etc.
After you migrate your e-commerce store, some issues may arise that negatively affect the overall SEO score. You should run a thorough audit using an online SEO analysis tool to ensure that there are no such problems, e.g., slow pages, orphan pages, 404 pages, etc.
Changing your e-commerce store’s server can be necessary for different purposes. You may need to change your server if you require better performance, security features, and cost efficiency.
However, when carrying out this entire process, there are many different steps and precautions that you have to take. In the post above, we have mentioned seven of the most important things to do when migrating your e-commerce store.


