
How to Build a Website Using WordPress in Ten Steps?
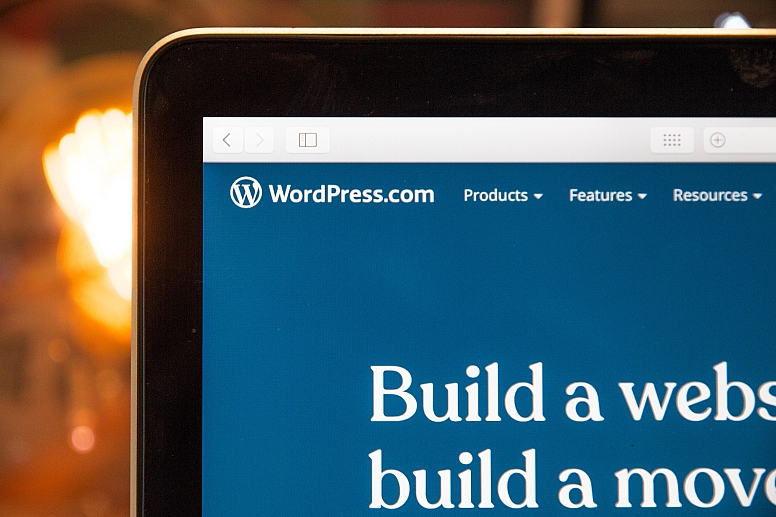
In this digital age, having an online presence is essential for individuals and businesses alike. WordPressrive on social media networks is one of the most widely favoured and user-friendly tools for developing websites.
With its intuitive interface and the vast array of customizable themes and plugins, WordPress can empower both a beginner and a seasoned WordPress agency to create stunning and functional websites.
If you're new to website creation or simply looking to leverage the power of WordPress, we will guide you through the journey of building your very own WordPress site.
What Are The 10 Steps To Create A WordPress Site?
Here Are The 10 Steps to Create a WordPress Site:
Step 1 Establish the purpose of your website: Before delving into the technical details, allocate some time to distinctly outline the intent and objectives of your website. Determine whether it's for personal blogging, online commerce, display of portfolios, or any other specific objective. This clarity will guide your design choices and content creation.
Step 2 Choose a Reliable Web Hosting Provider: To make your WordPress site accessible on the internet, you need a reliable web hosting provider. Look for hosting companies that offer good server performance, excellent customer support, and easy WordPress installation. Choose a plan that suits your website's needs and budget.
Step 3 Set Up a Domain Name: Selecting a domain name is crucial as it represents your website's identity. Choose a name that is relevant, easy to remember, and preferably includes your brand or keywords. Register your chosen domain name with a reputable domain registrar.
Step 4 Install WordPress: With your hosting account prepared, you are now able to set up WordPress. The majority of hosting providers include a one-click installation option for WordPress, streamlining the procedure to be fast and uncomplicated. Just locate the WordPress icon within your control panel, give it a click, and then adhere to the provided instructions for installing WordPress onto your domain.
Step 5 Choose and Customize a WordPress Theme: WordPress provides a wide range of themes to choose from, both free and premium. Select a theme that aligns with your website's purpose and customize it to reflect your brand identity. Customize the colour scheme, layout, and other elements to create a visually appealing website.
Step 6 Install Essential Plugins: Plugins elevate the functionality of your WordPress website. Install essential plugins such as an SEO plugin for search engine optimization, a security plugin to protect your site, and a caching plugin to improve performance. Research and install other plugins based on your specific needs.
Step 7 Create and Organize Content: Start creating the core content of your website. Create relevant pages such as Home, About, Services, Contact, and any other necessary pages. Organize your content using categories and tags to enhance navigation and user experience.
Step 8 Customize Site Settings: Configure important site settings such as site title, tagline, permalink structure, and privacy settings. Optimize your website's performance by enabling caching, enabling a content delivery network (CDN), and configuring other performance-related settings.
Step 9 Add Essential Functionalities: Enhance your website's functionality by adding features such as contact forms, social media integration, email subscription forms, and analytics tracking. Install and configure plugins that provide these functionalities and customize them to suit your requirements.
Step 10 Regularly Maintain and Update Your Site: Regularly update your WordPress version, themes, and plugins to ensure optimal security and performance. Back up your website regularly to safeguard against data loss. Continuously monitor and improve your site's speed, SEO, and user experience.
Can You Use WordPress With a VPN?
Yes, you can use WordPress with a VPN to enhance the security and privacy of your WordPress site. By using a VPN like NordVPN, you can encrypt your internet traffic, protect your online activities from prying eyes, and hide your real IP address.
This allows you to securely access your WordPress admin panel, manage sensitive tasks, and protect your data, even when connected to public Wi-Fi networks. NordVPN is a trusted VPN service, that offers NordVPN Philip Defranco advanced security features and a wide network of servers worldwide.
To learn more about VPNs and their benefits, you can visit VPNBlade.com, a reputable website that provides information and reviews on various VPN services. Incorporating a VPN into your WordPress site-building process adds an extra layer of security and privacy to ensure a safe online experience.
What Are The Benefits Of VPN For WordPress in Another Country?

Using a VPN (Virtual Private Network) for WordPress when accessing it from another country, such as Iran, offers several benefits. Here are some benefits:
- Bypass Geo-restrictions: Some WordPress themes, plugins, or content may be restricted based on geographical locations. With a VPN like NordVPN, you can connect to a server in a different country, effectively bypassing these restrictions. This allows you to access and utilize the full range of WordPress resources and functionalities available worldwide.
- Secure Data Transmission: When accessing your WordPress site from another country, especially when using public Wi-Fi networks, your data is vulnerable to interception. By using a VPN, your internet traffic is encrypted, ensuring that your login credentials, website data, and other sensitive information remain secure. NordVPN employs strong encryption protocols to protect your data and maintain your online privacy.
- Maintain Website Performance: Sometimes, accessing your WordPress site from another country may result in slower loading speeds due to network routing or distance. By connecting to a nearby VPN server in a country with better internet infrastructure, you can improve your website's performance and speed, ensuring a smoother experience for your visitors.
- Protect Online Privacy: In countries like Iran where internet censorship and surveillance are prevalent, using a VPN can help protect your online privacy. By masking your IP address and encrypting your internet traffic, a VPN prevents your activities from being monitored or tracked by ISPs, government agencies, or other entities.
- Avoid Content Filtering: In some countries, access to certain websites, social media platforms, or online services may be restricted or filtered. By connecting to a VPN server in a different country, you can bypass these content filters and access the full internet, including WordPress resources and support.
By utilizing a VPN like NordVPN Iran when accessing your WordPress site from another country like Iran, you can enjoy the benefits of enhanced security, privacy, improved performance, and unrestricted access to WordPress resources and content.
Can You Build A WordPress Website Yourself?
Absolutely! Building a WordPress website yourself is not only possible but also highly accessible for individuals with little to no coding experience.
WordPress offers a user-friendly interface and a vast ecosystem of themes, plugins, and resources that empower users to create professional and functional websites.
With step-by-step tutorials, online documentation, and a supportive community, you can learn the ins and outs of WordPress and customize your website to meet your specific needs.
Whether you're looking to start a personal blog, showcase your portfolio, or launch an online store, building a WordPress website yourself is an achievable goal that allows you to have full control over your online presence.
How WordPress Works Step By Step: A Beginner's Guide
Step 1: Choose a Web Hosting Provider: To start building a WordPress site, you need a web hosting provider that supports WordPress. Look for a reliable hosting company that offers easy WordPress installation, good server performance, and excellent customer support.
Step 2: Install WordPress: Most web hosting providers offer a one-click WordPress installation option. Simply log in to your hosting account, navigate to the control panel, and follow the instructions to install WordPress on your domain.
Step 3: Access the WordPress Dashboard: After installation, you can access the WordPress dashboard by typing your domain name followed by "/wp-admin" in your web browser. Use the username and password you created during the installation process to log in.
Step 4: Choose a WordPress Theme: WordPress provides a vast collection of themes that determine the overall design and layout of your website. Look through the different themes and select one that fits the purpose of your website. Install and activate the theme within the WordPress dashboard.
Step 5: Customize the Website: Once you have a theme installed, you can customize your website's appearance and functionality. Access the WordPress Customizer or theme options to modify settings such as colours, fonts, layouts, and menus. Many themes also provide options to upload a logo and customize header and footer sections. You can also utilise online tools such as a logo maker to streamline the process of building your brand identity.
Step 6: Create Pages and Posts: In the WordPress dashboard, you can create pages for different sections of your website, such as Home, About, Services, and Contact. You can also create blog posts to share content and engage with your audience. Use the intuitive editor to add text, images, videos, and other media to your pages and posts.
Step 7: Install Plugins: Plugins extend the functionality of your WordPress site. Navigate to "Plugins" in the dashboard and click "Add New" to access the WordPress plugin repository. Search for plugins based on your needs, such as contact forms, SEO optimization, security enhancements, and social media integration. Install and activate the desired plugins to add specific features to your site.
Step 8: Customize Settings and Permalinks: WordPress allows you to customize various settings to optimize your website. Configure general settings, including site title, tagline, and time zone. Set up permalinks to define the structure of your website's URLs, making them more user-friendly and search-engine-optimized.
Step 9: Create Navigation Menus: Organize your website's navigation by creating custom menus. In the WordPress dashboard, go to "Appearance" and select "Menus." Create a menu, add pages, categories, or custom links, and arrange them in the desired order. Assign the menu to a specific location, such as the primary or footer menu.
Step 10: Publish and Maintain Your Site: Once you have customized your website and added content, preview your changes and ensure everything looks as intended. To make your site live, click the "Publish" button. Regularly update WordPress, themes, and plugins to ensure security and functionality. Back up your website regularly to safeguard your data.
By following these steps, you can build a WordPress site and unleash the full potential of this versatile platform to create a unique and engaging online presence.
Building a website using WordPress is a straightforward process that can be accomplished in ten simple steps. With WordPress's user-friendly interface, customizable themes, and extensive plugin options, anyone can create a professional and functional website without advanced coding knowledge.
By following the outlined steps, you can successfully build your WordPress site and establish an online presence that reflects your unique goals and objectives.


0.1162